Rescues will need to be done and there is a high chance that you will participate in a rescue. You need to be prepared and be able to prevent potential drownings, recognize a distressed swimmer and act fast when needed.
The first step of a rescue is prevention. At JBS we like to say “the best guard is a dry guard” and most likely the least recognized by the public. There are different depth restrictions for how far swimmers can be. The managers decide this for the day depending on weather and water conditions and it is up to you to enforce it. Swimmers can be out of the water completely, ankle deep, knee deep, waist deep, or chest deep. Swimmers must be able to touch the ground at all times while in your zone, this means that even if a child is with an adult, they cannot be lifted into deep water. Keeping your swimmers close is one of the hardest tasks because it takes the most effort due to constant reinforcement. You will have to use a single whistle blast a lot to gain the public’s attention.
When you recognize that you are needed for a rescue you will call it over the radio first by saying your stand name and the emergency code (Table 4), ex : “Breakers, code 2”. Then you will unclip your fanny pack (containing your moneybook, pocket mask, and radio) leaving it in a safe place and blow your whistle with three long crisp blasts to alert your border guards in case of technical radio difficulty.
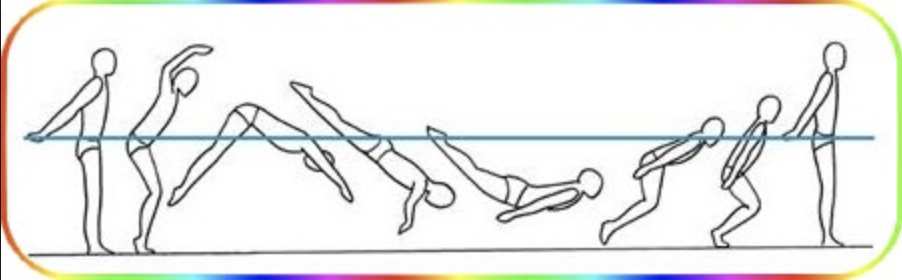
Before entering the water, you must put on your buoy with the strap around your chest. The buoy is then thrown behind you to make sure it does not hit you during your rescue. When doing entries you must first use high knees to jump over low waves, when you feel that is ineffective and you are slowing down (about thigh deep) you will use the dolphin dive technique (Figure 3). This is to cut through waves and get to your victim as fast as possible.
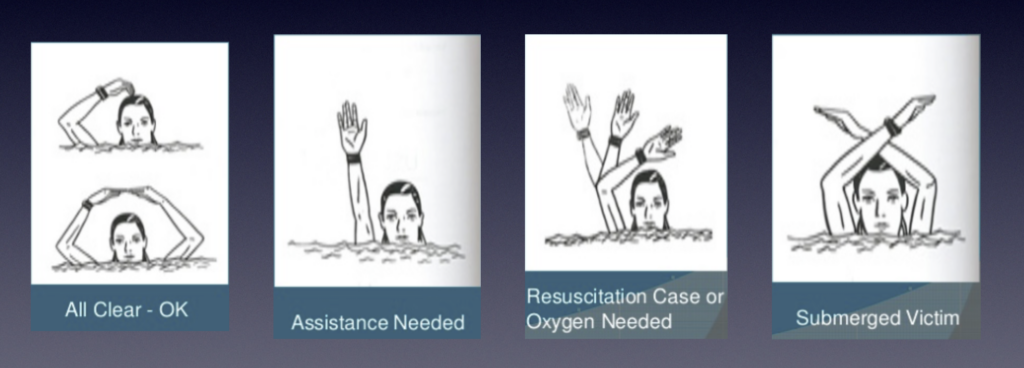
Once you get to your victim you can use a variety of holds with your buoy to support the victim and swim them to safety. Ideally there will be three guards for one rescue, so your border guards will be arriving as soon as they can to help. To communicate with them while you are in the water, we use the hand signals to indicate “OK/ all clear”, “Assistance Needed”, “Resuscitation will be needed”, and a “submerged victim” (Figure 4).